How to Remove iCloud from Your iPhone
Introduction:
iCloud is a cloud storage and synchronization service offered by Apple, designed to keep your data secure and easily accessible across multiple devices. However, there may be circumstances where you need to remove iCloud from your iPhone, such as when selling or giving away your device or when encountering issues with your iCloud account. In this blog post, we will provide you with a step-by-step guide on how to remove iCloud from your iPhone to ensure a smooth transition or address any concerns you may have.
Step 1: Backup your iPhone:
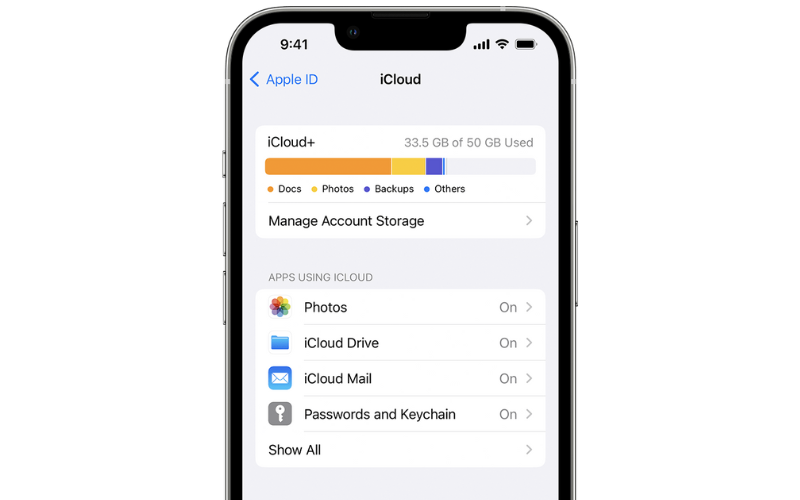
Before proceeding with removing iCloud, it’s crucial to back up your iPhone to preserve any important data you want to keep. You can back up your iPhone using iCloud or iTunes. To back up with iCloud, go to “Settings,” tap your Apple ID at the top, select “iCloud,” and then “iCloud Backup.” Ensure the backup is complete before moving to the next step.
Step 2: Sign out of iCloud:
To remove iCloud from your iPhone, you need to sign out of your iCloud account. Go to “Settings” and tap your Apple ID at the top of the screen. Scroll down and select “Sign Out.” Enter your Apple ID password when prompted and tap “Turn Off” to disable Find My iPhone.
Step 3: Choose data to keep on your iPhone:
After signing out of iCloud, you’ll be presented with options to keep or delete data on your iPhone. You can choose to keep the data on your device or remove it. If you plan to continue using the iPhone, it’s advisable to keep the data.
Step 4: Remove iCloud contacts, calendars, reminders, and bookmarks:
In the same section where you signed out of iCloud, you’ll find options to keep or delete data for various apps and services. Tap on “Keep on My iPhone” for contacts, calendars, reminders, and Safari data to ensure they remain on your device even after removing iCloud.
Step 5: Reset all settings:
To completely remove iCloud from your iPhone, you’ll need to reset all settings. Go to “Settings,” select “General,” scroll down, and tap on “Reset.” Choose “Reset All Settings” and confirm your decision. This action will erase all personalized settings while preserving your data and media.
Step 6: Erase all content and settings:
To finalize the removal of iCloud and ensure your personal data is securely deleted, you can choose to erase all content and settings on your iPhone. Go to “Settings,” select “General,” scroll down, and tap on “Reset” once again. This time, choose “Erase All Content and Settings.” Confirm your selection and enter your device passcode if prompted.
Step 7: Set up your iPhone as new or restore from backup:
After erasing all content and settings, your iPhone will restart and display the “Hello” screen. From here, you can choose to set up your iPhone as new by following the on-screen instructions. Alternatively, if you made a backup in Step 1, you can select “Restore from iCloud Backup” or “Restore from iTunes Backup” to restore your data onto the device.
Conclusion:
Removing iCloud from your iPhone is a straightforward process that ensures your device is ready for a new owner or resolves any issues you may have encountered with your iCloud account. By following the steps outlined in this guide, you can safely and effectively remove iCloud, preserving your data and personalizing your iPhone according to your needs. Remember to back up your iPhone before making any changes and make informed decisions about what data you want to keep or delete during the process.